Ultimate Drone Photography Tips for Beginners

Photo credit: https://www.dji.com/spark?site=brandsite&from=nav
Ultimate Drone Photography Tips for Beginners
Shooting “on the fly” takes on a whole new meaning when it comes to drones, and if you’re reading this, you’ve probably just started out or are seriously considering learning how.
Well, you’ve come to the right place, because in this post, we’ve put together the ultimate drone photography tips for beginners which include pointers for
- Flying
- Shooting
- Care and Maintenance
- Choosing Your First Drone
Dive right in and keep these tips handy for when you take your drone out for some fly-and-shoot fun!
First, Read Before You Fly

Photo credit: https://dl.djicdn.com/downloads/Spark/20180209/Spark_Quick_Start_Guide_V1.6_EN.pdf
Before you start shooting, you’ve got to get flying down pat.
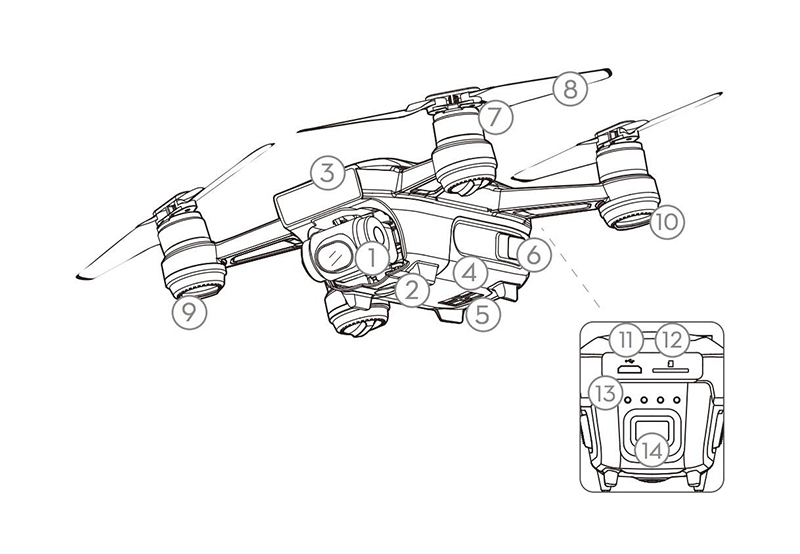
1. Get to know your drone.
We know this may sound obvious, but you’d be surprised at how many people will skip reading the manual when they get their first drone, preferring to “learn by doing”. While their enthusiasm may be commendable, it could also lead to avoidable accidents or even damaging the drone (or injuring themselves).
Finding out whether your new drone has any pre-set movements and such is the only way you’ll be able to get it to do what you want while taking shots. Take note of how long the battery lasts, as well as any smart features the drone has such as subject tracking or being able to set a flight path.
2. Figure out the settings it has.
Many drones have settings for manoeuvrability and speed, but settings are especially important as regards the camera on the drone, as those that aren’t done manually may include resolution, exposure and frame rate. These settings affect the quality of your shots (and separate the newbies from the pro’s).
There are many online tutorials that you may refer to as you learn to adjust the settings on your drone, but really, the best way to learn this is through hands-on experience.
3. Practice makes perfect.
On top of the actual flying, another skill you can practise is making manual adjustments to the camera to get the shots you want. The more often you fly, the more confident you’ll become, and the smoother your flights and your shooting experience will be.
4. Accessories aren’t just bells and whistles.
Take stock of what your drone comes with so you can get any accessories you need that will make flying and shooting easier. If your drone doesn’t already come with one, you might want to get a gimbal to help steady your shots.
Another accessory you might want, depending on how much time you see yourself flying is an extra battery. Making sure that your drone is compatible with your mobile phone is also a good idea.
Other accessories you might want for your drone include:
- Goggles
- Charging station
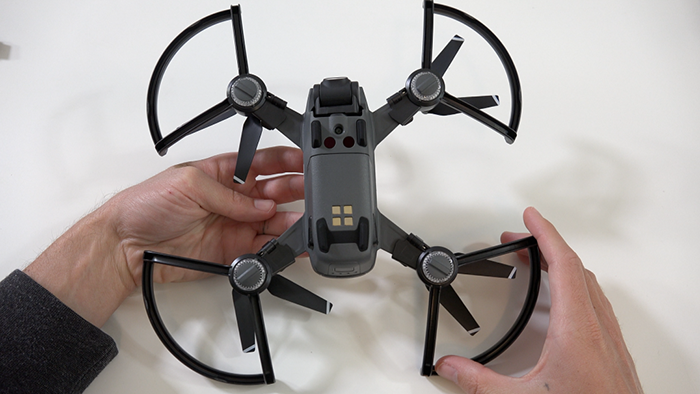
- Propeller guards
- Hand guards
- Gimbal protectors
- Landing gear risers
- Spare propellers
- Remote control
- Carrying cases
- USB pins and cables
- Monitor hoods
- Memory cards
- Filters
- LED lights
- Landing pad
5. Know the law.
Knowing where you’re legally allowed to fly along with all the safety rules and regulations is serious business, as many people have voiced their concerns over issues like privacy or security when it comes to drones. After all, nobody wants to get fined or go to prison.
To help you abide by drone laws which, in Australia are laid down by the Civil Aviation Safety Authority or CASA, there are drones that are pre-programmed to avoid flying in prohibited areas. You may not, for instance, fly a drone near emergency or public safety areas like a fire or a road accident.
Get the rules in detail at CASA’s new website, Droneflyer.
6. Know what other pilots are up to.
It’s a good idea to check out what other drone pilots are doing, and to know what the latest developments are in the drone world. You can learn flight or photography techniques, and stay up to date with the latest drone models and accessories and any new flight regulations.
You can also get ideas for shots you can take or find inspiration in the work of professional drone photographers and videographers. In looking at top quality work in this early stage of your development as a drone pilot, you set yourself on the same path, or set high standards you can aspire to.
Now That You’re Airborne, Start Shooting
1. When’s the right time of day for shooting?
Traditionally, the so-called “golden hours” for shooting, when the light is at its best on a clear day are between 10AM and 3PM. When shooting with a drone cam, however, you might want to experiment with shooting earlier or later in the day, around sunrise or sundown.
This is because, since the sun won’t be more or less directly overhead, shadows become longer and textures become more apparent.
2. How to frame a shot.
Even though you’ll be shooting with a bird’s eye view instead of on foot, the principles or techniques you use when taking landscape photos will still come in handy. Bear in mind that when you shoot with a drone, your landscape will have a tendency to look flat.
To mitigate this “flat look”, you might want to look for contrasts, like a road in a field or a field of flowers next to a clump of trees. On the other hand, shots taken directly above a subject such as a pond or a flower bed can also be interesting.
Patterns also look good from far away, such as the lines on a farmed field or trees in an orchard or garden, or perhaps a row of houses with colourful roofs.
3. Get just the right angle.
It’s a good idea for drone photographers who are new to the art to shoot directly in their line of sight, or directly in front of them (which, in any case, is a CASA mandate). Because of their vantage point, drones make taking panoramic shots so much easier.
It’s also a good idea to keep your drone at a relatively low altitude, especially if you’re just starting out. CASA regulations stipulate that pilots are not allowed to fly drones higher than 120 metres (400 feet) above the ground.
If you’re worried that you won’t be able to show that a shot has been taken from a great height while doing this, try getting a large object in the foreground so that the distance behind it becomes more obvious.
4. Learn how to take shots while panning.
This means taking a shot while crossing from one side to the other. There are a number of techniques you can practise, such as orbiting, flying-through, and sliding from side to side.
It would be easier, however, to let the drone do the work for you if you’re panning to follow something moving like a walking person or a running pet. You can do this by making the most of your drone’s smart features such as auto-tracking.
5. Take “safety shots”.
Instead of only shooting at the exact spot where you planned on taking a photo or a video, try to start and end shooting a little bit before and after you reach it. This is to give you some leeway or widen your shooting window, so to speak, in case taking the “perfect shot” proves difficult to get exactly right.
6. Touch up and go.
While professional photographers and videographers will tell you that too much post-production is, well, unprofessional, it may enhance your enjoyment of the flying and shooting process knowing that you can always retouch your shots later on.
Eventually, you may come to enjoy the process of getting the shot exactly right, but if you’re just starting out, knowing that there’s a lot of editing software out there might be comforting. You may want to familiarise yourself with using this kind of software, as well.
How To Give Your Drone Some TLC

Photo credit: http://lounge.d1store.com.au/content/dji-spark-unboxing-powerfully-compact-and-gesture-smart
Buying a drone is a significant investment for a lot of us, so it makes sense to take good care of it.
1. Steer clear of crashes.
Accidents will happen, but that doesn’t mean you can’t guard against them. With this in mind, drone manufacturers such as DJI have already installed features that allow a drone to avoid things they might crash into.
It would still be up to you, though, to take extra care around trees and other obstacles as these features aren’t 100% foolproof.
2. Make sure your baby comes back.
You should also be aware of the possibility of your drone getting lost, mid-flight. Even though many drones are pre-programmed to return to you if they start to run out of power, it’s also up to you to take precautions to prevent flyaways.
3. If you get car insurance, why not drone insurance?
Insuring your drone is only common sense, and there are insurance plans that provide replacement parts for your drone (or a new drone altogether).
Bear in mind, however, that getting drone insurance doesn’t just involve damage to your drone but to property and people (which is why CASA also doesn’t allow us to fly over areas with people in it such as beaches or parks). You may want to find third-party insurance in the event of your drone getting involved in such an accident.
4. Let it rain on your parade.
Don’t insist on flying your drone in bad weather, and we’re not just talking about rain. Heavy winds can send your drone past the point of no return, and even too much sun can potentially ruin your shots—you’ll have to learn to work with the sun and the shadows it casts. Be sure you don’t shoot directly at the sun itself.
5. Make a pre-flight checklist.
And make it a habit (as in “No pre-flight check, no fly”). Things to tick off your checklist include:
- No damaged or dirty parts
- All systems are go
- Batteries are fully charged
- Sufficient digital storage space
- Flight plan
- Expected shooting time
- Expected obstacles
- Weather conditions
6. Keep your drone clean.
A clean drone is a drone that works well, but don’t just whip out a tissue and wipe—use a soft cleaning brush and an air dust blower for those hard-to-reach places. You can also use a microfibre cloth with isopropyl alcohol and, depending on your drone’s manufacturer, lubricant for the drone motor.
Fledgeling drone pilots who have yet to acquire the necessary skills also probably shouldn’t disassemble the drone for cleaning.
7. Keep your drone safe.
When storing or transporting your drone, make sure you use the right carrying case, and put your batteries in the right kind of separate case of their own. To avoid damaging your gimbal, keep the gimbal clamp attached before you store your drone. Also remove any parts that need to be removed before storage.
8. And keep your batteries charged.
Be sure you use batteries at the temperature prescribed by the manufacturer. Batteries shouldn’t get wet, must not be taken out of the drone if the drone is turned on, and must not be used at all if a warning pops up saying there’s something wrong with them.
If you’re flying on an extremely hot day, keep an eye on your battery’s temperature—if it hits 65°C (104°F), land your drone right away. Wait for the battery to cool down after a flight before you charge it up again.
Don’t ever use damaged chargers, and make it a habit to check the cables and other parts. Once the battery is fully charged, take it out of the charger and don’t let it sit there.
Also make sure you don’t let your batteries sit for too long without using them because it could affect how well they work. If you know you won’t be able to use them for three months or more, discharge your batteries by about 40 to 65% to avoid damage. If you’re taking batteries on a plane, discharge them to 5%.
Why DJI Spark is an Ideal First Drone

Photo credit: https://www.dji.com/spark?site=brandsite&from=nav
If you haven’t already gotten your first drone, here’s why you should consider getting a Spark.
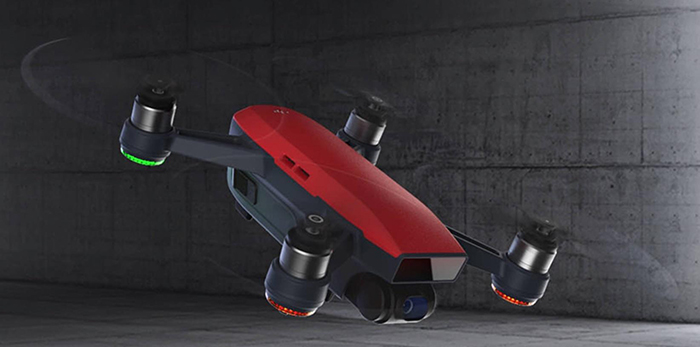
The Spark is lighter and considerably more affordable than your average drone and is a lot more beginner-friendly. Its small and compact size make it super convenient to carry around. The controls are easy and intuitive thanks to its 3D Sensing System, which allow you to use hand movements to give it commands.
Spark’s stable, high-resolution camera combined with its QuickShot Intelligent Flight Modes make it easy to take great pictures and videos. Panning is a breeze with its Horizontal Pano and ActiveTrack modes.
For smooth and safe flights, the Spark automatically avoids front obstacles as well as the ground, while its flight path pre-sets and return-to-home feature help you make sure it doesn’t get lost.
But if you’ve logged in enough hours flying other people’s drones and would like something a step or two up now that you’re getting a drone of your own, DJI has other beginner drones you can choose from.
Get authentic DJI drones and accessories at Australia’s first and only DJI authorised retail store, D1 Store, today.
Sources:
https://www.digitaltrends.com/photography/guide-to-aerial-drone-photography/
https://www.amateurphotographer.co.uk/technique/camera_skills/drone-photography-tips-beginners-117449
http://www.droneguru.net/a-beginners-guide-to-drone-photography-12-insider-tips-for-success/
https://www.casa.gov.au/standard-page/new-recreational-drone-rules
https://fpvaustralia.com.au/drone-insurance/
https://store.dji.com/guides/properly-maintain-drone/
https://www.androidcentral.com/how-clean-and-take-care-your-drone
https://qz.com/994904/the-dji-spark-is-the-first-drone-for-anyone/
https://www.dji.com/newsroom/news/dji-spark-camera-drone-becomes-more-fun-and-intelligent-with-new-video-and-photo-features
